Adding Metadata in Yoda#
Overview#
This guide explains how to add metadata to your files in Yoda for the Delta Enigma project. Proper metadata is crucial for making your data findable, accessible, and reusable by other researchers.
Prerequisites#
Uploaded data to Yoda (see Uploading Data)
Access to SURF Yoda portal
Required Metadata Fields#
For the Delta Enigma project, the following metadata fields are mandatory:
Title: A descriptive name for your dataset
Description: Brief explanation of what the data represents
Creator: Name of the person who created the data
Collection Date: When the data was collected
Location: Geographic location where data was collected
Instrument: Device or method used to collect the data
Work Package: The Delta Enigma work package this data belongs to
Adding Metadata#
Step-by-Step Guide#
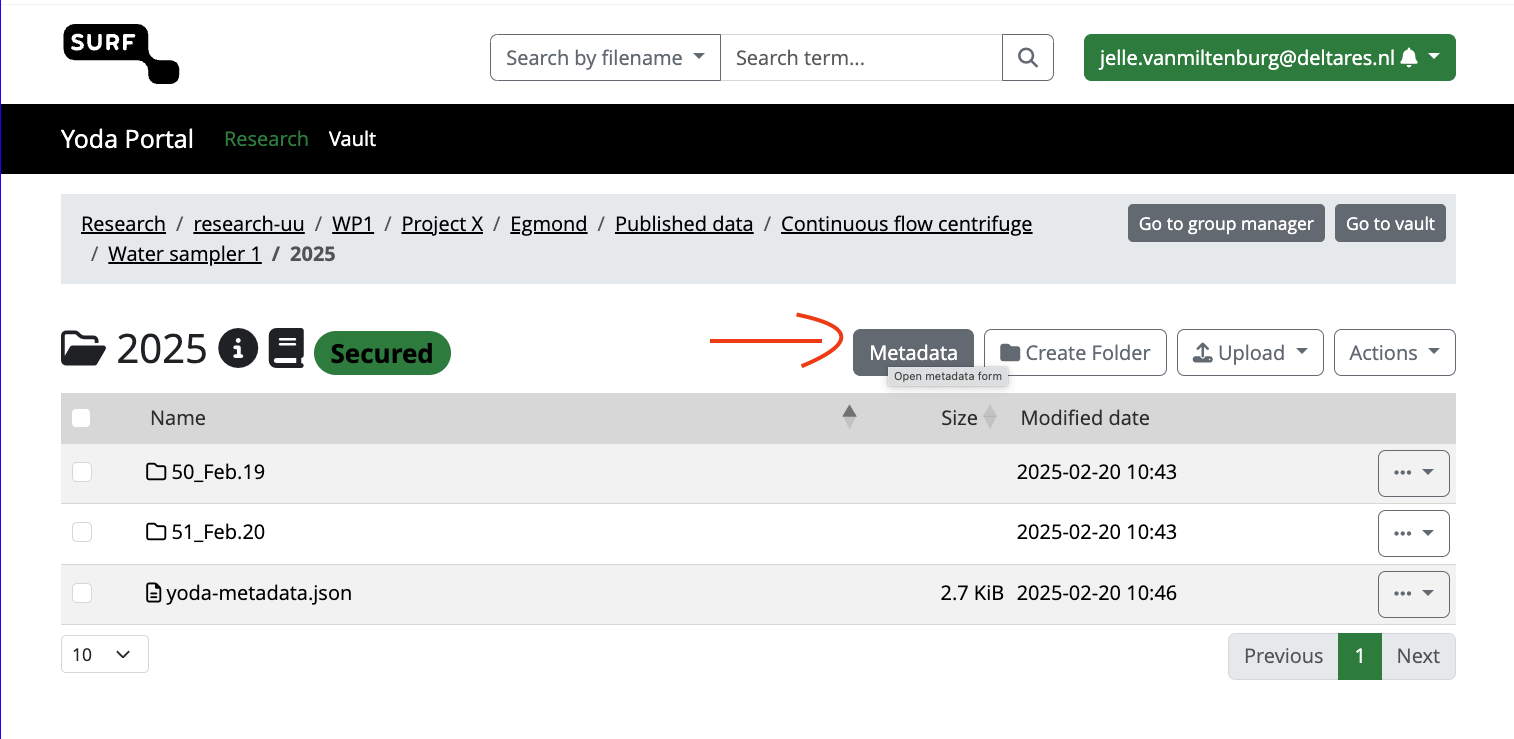
Select Your Files
Navigate to your data folder in Yoda
Select the file(s) you want to add metadata to
Click the “Metadata” button in the top menu
Fill in Metadata Fields
Complete all mandatory fields
Add any additional relevant information
Be as specific and accurate as possible
Save Your Changes
Click “Save” to apply the metadata
Verify that the metadata was saved successfully
Best Practices#
Add metadata immediately after uploading files
Use consistent terminology across your datasets
Include units of measurement where applicable
Be specific in your descriptions
Cross-reference related datasets if applicable
Example Metadata Entry#
Here’s an example of good metadata for a camera image:
[Actual example is coming soon]
Updating Metadata#
To modify existing metadata:
Select the file(s)
Click “Metadata”
Update the necessary fields
Save your changes
Additional Resources#
Contact your Data Steward for assistance