Building-level measures
FloodAdapt can simulate different types of building-level adaptation actions: elevate, buyout, and floodproof properties. This section describes how these measures can be specified in FloodAdapt and how they are represented in the modeling.
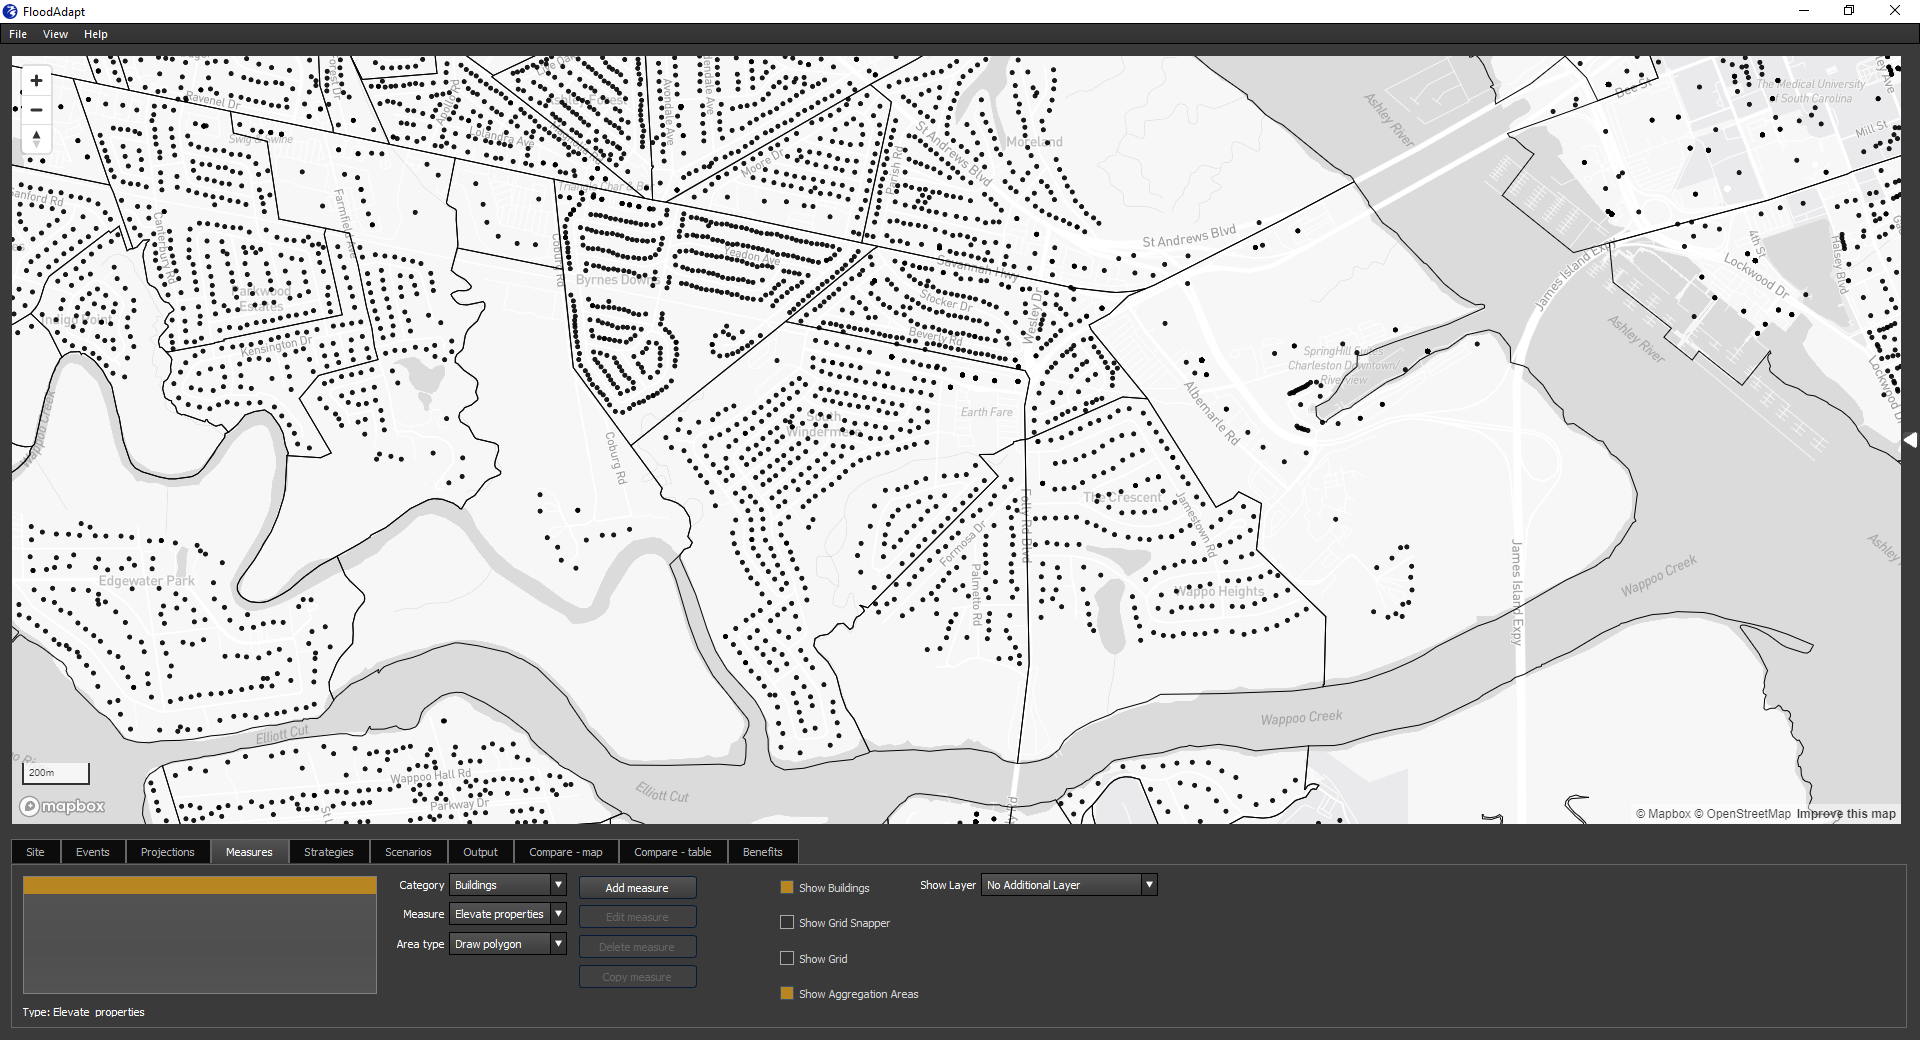
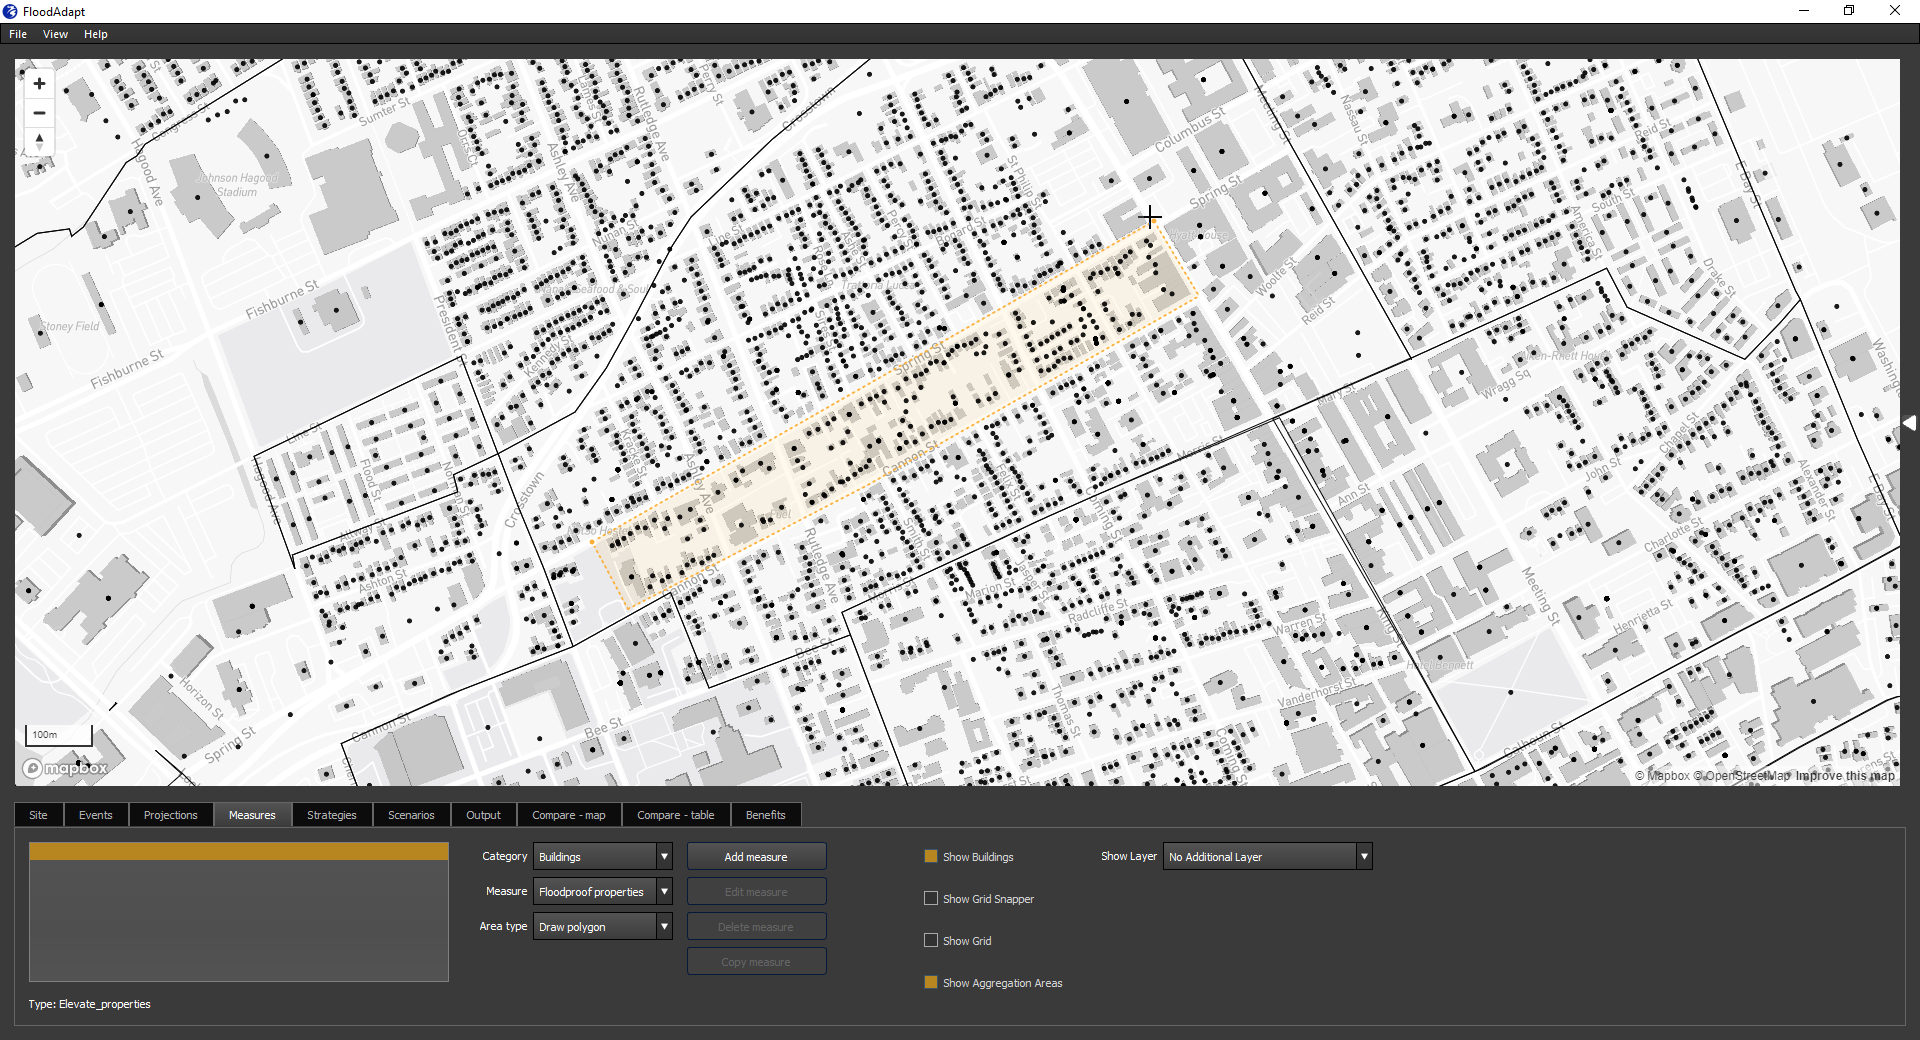
To specify a building-level measure, the user goes to the Measures tab, and in the “Category” drop-down menu selects “Buildings” (see Figure 2). The user can then choose for “Measure” one of the three measure types: elevate, buyout, or floodproof properties. For each of these measures, the user will choose an “Area type”. This indicates how the user will select the buildings to which they want to apply the measure. There are three options:
Draw polygon: this option allows a user to click a polygon in the map to select the buildings of interest
Aggregation area: this option allows a user to apply the measure to an entire aggregation area, for example a neighborhood
Import polygon: this option allows a user to import a polygon that they have made externally, for example in GIS software
When selecting buildings using the “Draw polygon” feature, it is useful to click on the “Show Buildings” button in the Measures tab (see example in Figure 2). This shows the buildings that are in the exposure data of the impact model within FloodAdapt.
Each of the building-level measures allows users to specify a property type to which the measure should be applied. So, for example, if a user selects a neighborhood, but only wants to apply the measure to the residential properties within the neighborhood, they are able to specify this. The property type is linked to an attribute in the impact model called the ‘primary object type’. In the U.S, these are typically residential (RES) commercial (COM), industrial (IND), or public (PUB). You can also choose to apply the measure to all the buildings in the selected area.
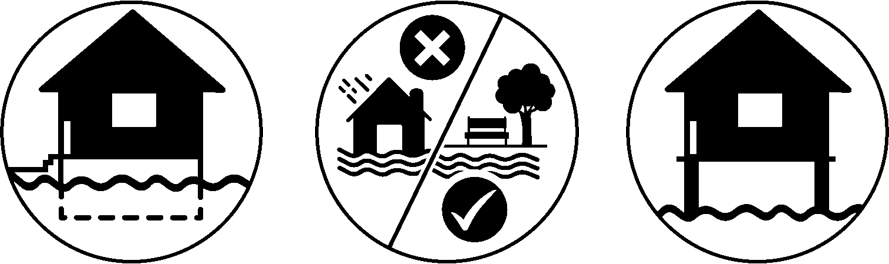
Elevate
Elevating properties refers to raising structures to make them less susceptible to floodwaters. To implement elevating buildings in FloodAdapt, go to the Measures tab, select “Buildings” for the Category, and then from the Measure drop-down menu, select “Elevate properties”. Select one of the “Area type” options and then click “Add Measure”. If you selected “Draw polygon”, you can now begin clicking within the map to draw a polygon to enclose the buildings to which you want to apply the measure (see example in Figure 3). When you are finished clicking the polygon, right click or double click to open the measure specification window (see Figure 7).
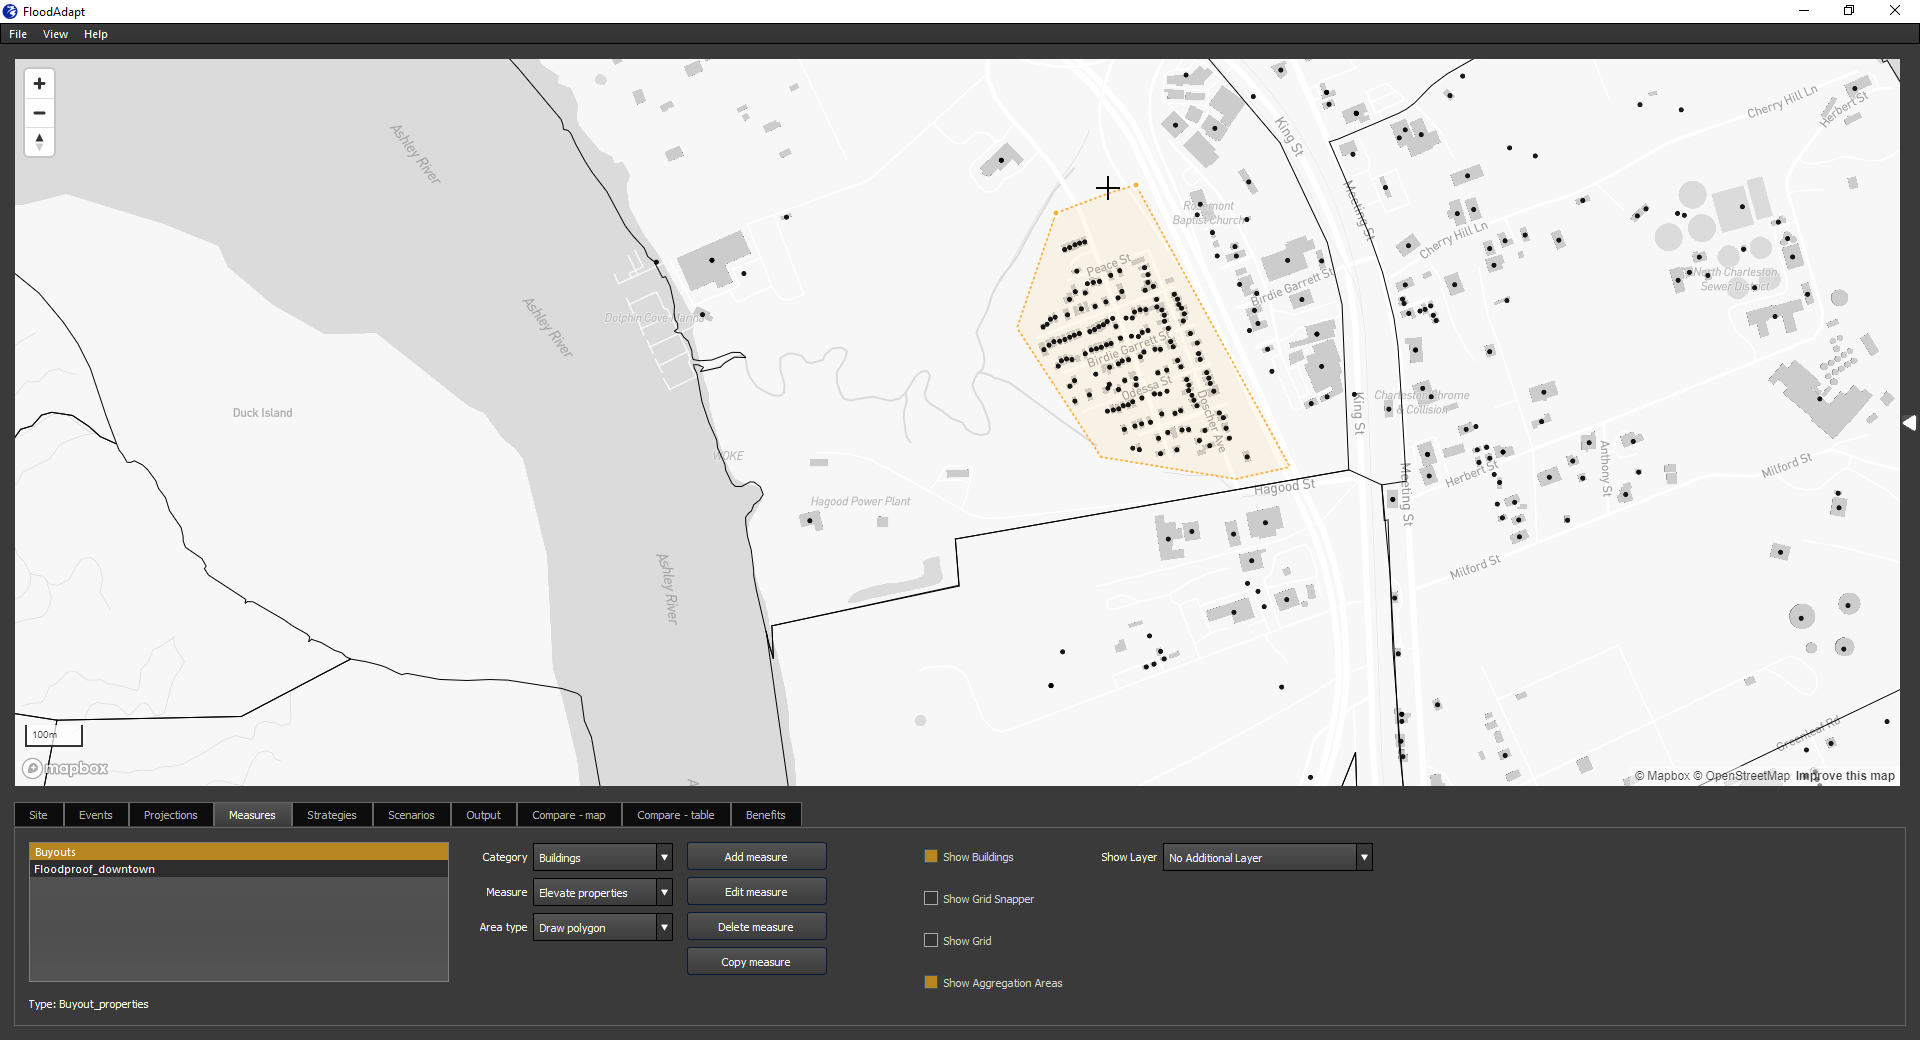
In the specification window, the user enters a name for the measure (no spaces or special characters), an optional description, the elevation in feet, a specification what this elevation is relative to (see info box below for more details), and the property type that the measure should be applied to. When these entries are complete, the user can click ‘OK’ and the measure will be added to the list of measures in the Measures tab. Note that if the user selects the “Aggregation area” option for selecting buildings, the specification window will automatically open and they will additionally be asked to choose an aggregation area (see Figure 5 for the example of buyouts)
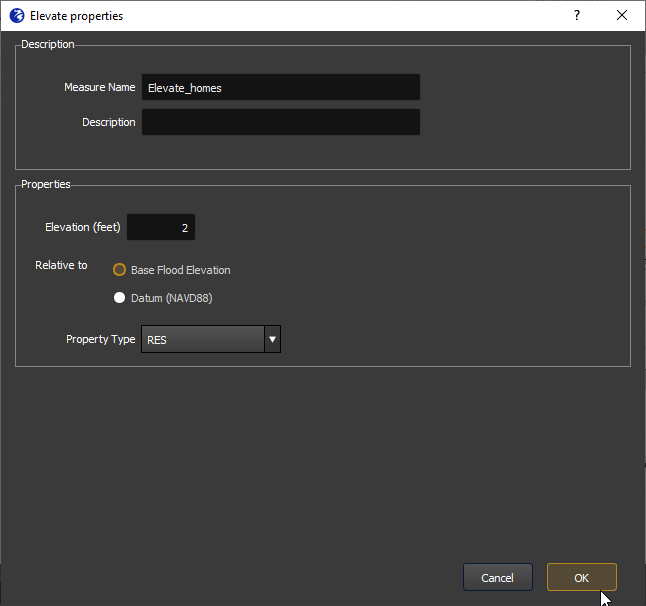
The elevate properties specification window asks the user to specify what the elevation of the property is relative to. The user can select the datum; in this case, the elevation is the elevation of the finished floor of the property above the specific datum. The user can also select to elevate properties relative to “Base Flood Elevation” (BFE). In this case the elevation is actually a height above this reference. In the U.S, BFE is a regulatory flood level that is related to insurance, and is often used in ordinances on how high new development must be built. In areas of the world where this is not used, the base flood elevation option may not be visible.
The exposed assets have multiple attributes, one of which is the height of the finished floor above the ground. When a user elevates properties, FloodAdapt adjusts this attribute for the selected properties to represent the user specifications. Whether a user specifies a property elevation as an elevation relative to a datum, or a height above a reference level like base flood elevation, FloodAdapt calculates for each selected property the equivalent height above the ground, and assigns this value to the finished floor height attribute of the elevated property. For example, if a user selects 12 feet above datum, and the ground elevation where a property is located is 10 feet above datum, FloodAdapt calculates that the finished floor height of the property as 2 feet, and assigns this as the finished floor height attribute of the elevated property. Similarly, if a user selects 2 feet above BFE, and the BFE at the location of a property is 9 feet, then the property must be raised to 11 feet relative to datum. If the ground elevation at that location is 8 feet, FloodAdapt would calculate that the finished floor height for the elevated property is 3 feet.
Buyout
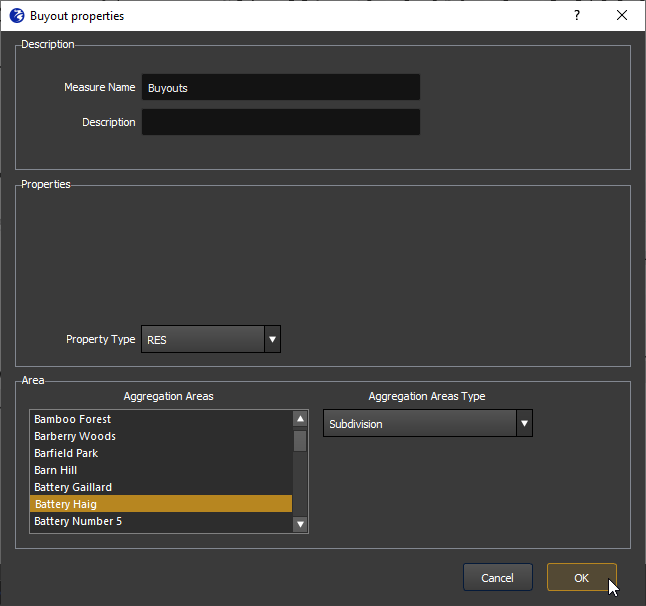
Buyouts refer to the purchase and subsequent removal of a property, usually one that is high risk or has experienced repetitive flooding. To implement the buyout measure, go to the Measures tab, select “Buildings” for the Category, and then from the Measure drop-down menu, select “Buyout properties”. Select one of the “Area type” options and then click “Add Measure”. If you selected “Draw polygon” for the Area type, you can now begin clicking within the map to draw a polygon to enclose the buildings to which you want to apply the measure. When you are finished clicking the polygon, right click or double click to open the measure specification window. If you select “Aggregation area” the specification window will automatically open when you click “Add measure” and you will additionally choose an aggregation area to apply the measure (see Figure 5).
In the specification window, the user enters a name for the measure (no spaces or special characters), an optional description, the property type that the measure should be applied to, and - if you selected “Aggregation area” - the aggregation area where the measure should be applied. When these entries are complete, the user can click ‘OK’ and the measure will be added to the list of measures in the Measures tab.
When a property has been bought out and removed, it is no longer an exposed asset in the project area. However, the implementation in FloodAdapt does not actually remove the properties from the exposure data; instead, the selected properties are assigned a maximum potential damage value of zero. The damage is calculated as the damage fraction (based on the inundation depth) multiplied by the maximum potential damage. Because the maximum potential damage is set to zero, the bought out properties will result in damages of zero, regardless of the inundation depth. In this way, it represents the situation that the property has been removed.
Floodproof
Floodproofing in FloodAdapt refers to dry floodproofing, which involves sealing a building’s exterior, typically through barriers or seals, to prevent floodwaters from entering and causing damage. The effect of floodproofing is that the building will not incur any damages until floodwaters exceed the height of the floodproofing seals.
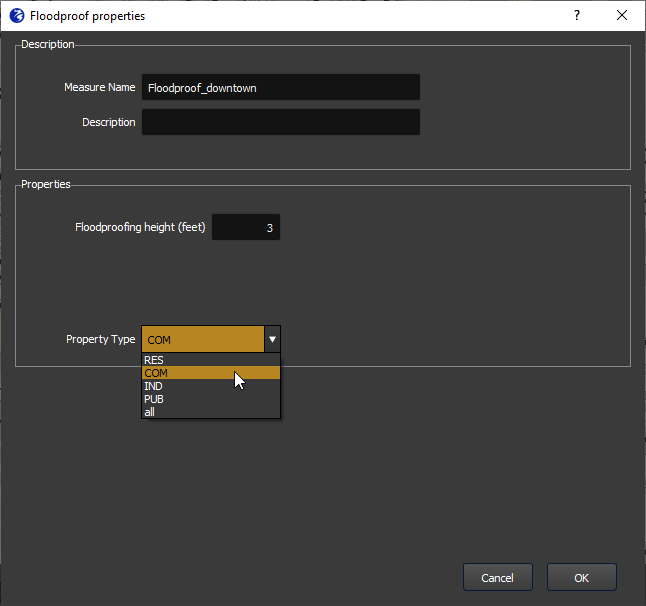
To implement floodproofing to buildings in FloodAdapt, go to the Measures tab, select “Buildings” for the Category, and then from the Measure drop-down menu, select “Floodproof properties”. Select one of the “Area type” options and then click “Add Measure”. If you selected “Draw polygon”, you can now begin clicking within the map to draw a polygon to enclose the buildings to which you want to apply the measure (see example in Figure 6). When you are finished clicking the polygon, right click or double click to open the measure specification window (see Figure 7).
In the specification window, the user enters a name for the measure (no spaces or special characters), an optional description, the height of the floodproofing, and the property type that the measure should be applied to. The floodproofing height ensures that damages only occur when the inundation depth is greater than the floodproofing height. When these entries are complete, the user can click ‘OK’ and the measure will be added to the list of measures in the Measures tab. Note that if the user selects the “Aggregation area” option for selecting buildings, the specification window will automatically open when they click “Add measure” and they will additionally be asked to choose an aggregation area (see Figure 5 for the example of buyouts)
The impact model uses depth-damage curves that relate inundation depths to fractions of total asset damage. When a user selects a floodproofing height, there will be no damage to the property until the inundation depths exceed that height. This is represented by modifying the depth-damage curve so that the damage fraction is zero below the floodproofing height. Above the floodproofing height, the damage curve is unchanged because once the inundation exceeds the floodproofing height, it is assumed the water will then enter the property and reach the levels it would have reached without the floodproofing barrier.